PHP Image Converter
Getting Started
- Product Name : PHP Image Converter
- Product Version : v 3.0.0
- Author : LittleJohn
- Email : westiti@gmail.com
- License : Codester Licenses
Welcome
Thank you for purchasing this script! 🎉 Your support means a lot.
By purchasing this script, you are entitled to:
- Free lifetime updates
- Direct support from the author
This documentation will guide you through installation, configuration, and customization of the app. Please read carefully to fully understand how the script is structured and how to make safe modifications.
If you have any questions that are beyond the scope of this documentation, please feel free to leave a comment or contact me through the email above.
Be careful while editing the source code. If not edited properly, the script may break completely.
Requirements
- PHP version 8.2 or higher.
- Apache server
-
The following PHP extensions should be installed and enabled:
- Bcmath
- Ctype
- cURL
- DOM
- Fileinfo
- Filter
- GD
- Hash
- Imagick
- Iconv
- Mbstring
- OpenSSL
- PCRE
- PDO
- Session
- Tokenizer
- XML
- Zip
- mod_rewrite enabled.
- MySQL Database version 8.0 or higher
If your hosting uses Nginx, make sure to add the following line to your Nginx configuration:
# Deny direct access to the Laravel core directory
location /laravel/ {
    deny all;
    return 404;
}
For additional details about server requirements and deployment best practices, refer to the official laravel documentation
Installation:
Step 1 - Upload files
-
Upload the
upload.ziparchive to your server. -
Extract it to the appropriate folder:
-
Shared hosting: usually
/public_html -
VPS hosting: typically
/var/www/example.com
-
Shared hosting: usually
Step 2 - Run installer
- Open your application URL in a browser.
-
The installer wizard will guide you through three steps:
- Server requirements
- Database setup
- Admin setup
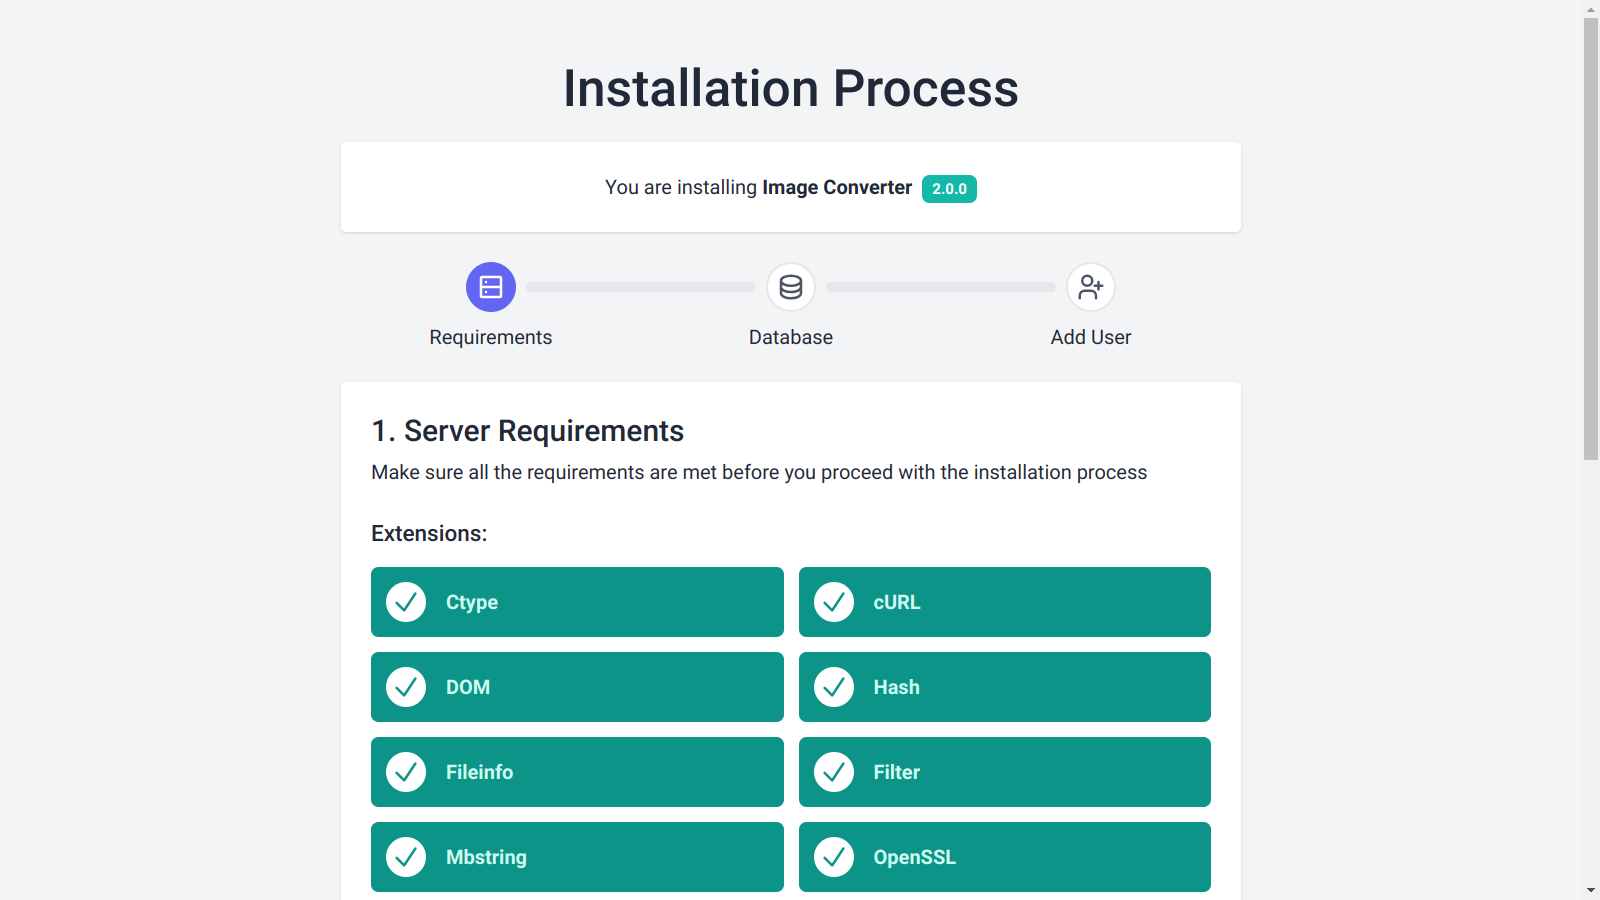
Step 2.1 - Server requirements:
This step checks that all required PHP extensions and server settings are correctly enabled before proceeding.
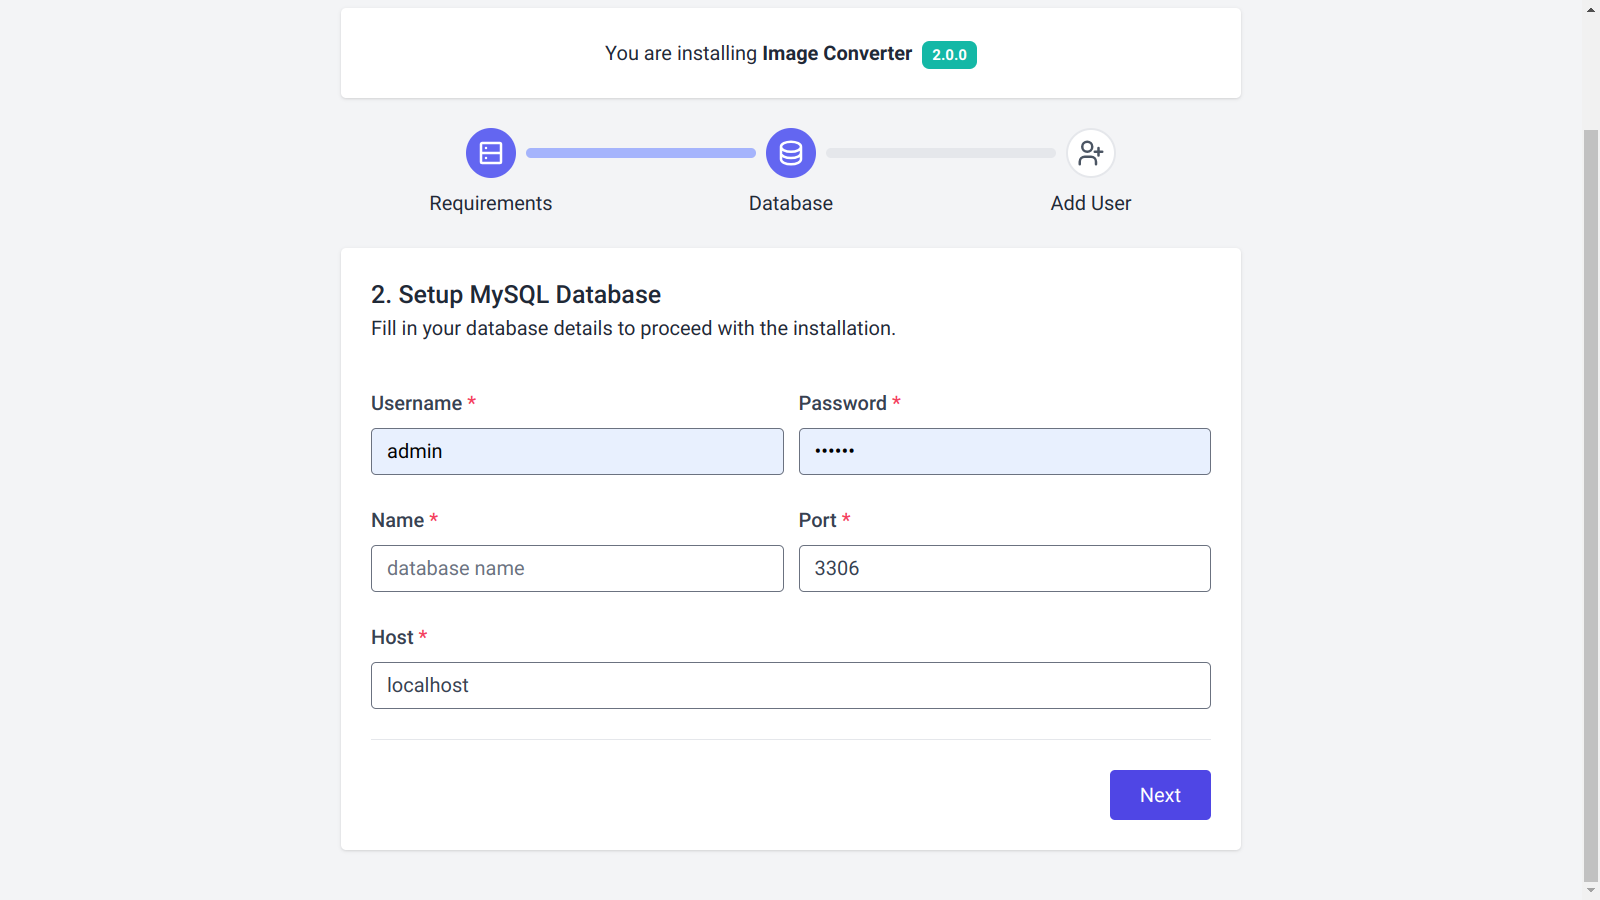
Step 2.2 - Database setup:
A MySQL database is required.
- cPanel users: Watch this tutorial on how to create a MySQL database.
- VPS users: The installer will attempt to create the database automatically.
Fill in the database details:
- Username: Database username
- Password: Database password
- Name: Database name
- Port: Usually
3306 - Host: Usually
localhost
Step 2.3 - Admin setup:
Create your admin account by filling in the required details.
- Ensure the website URL is valid.
- Click the Finish button to complete the installation process.
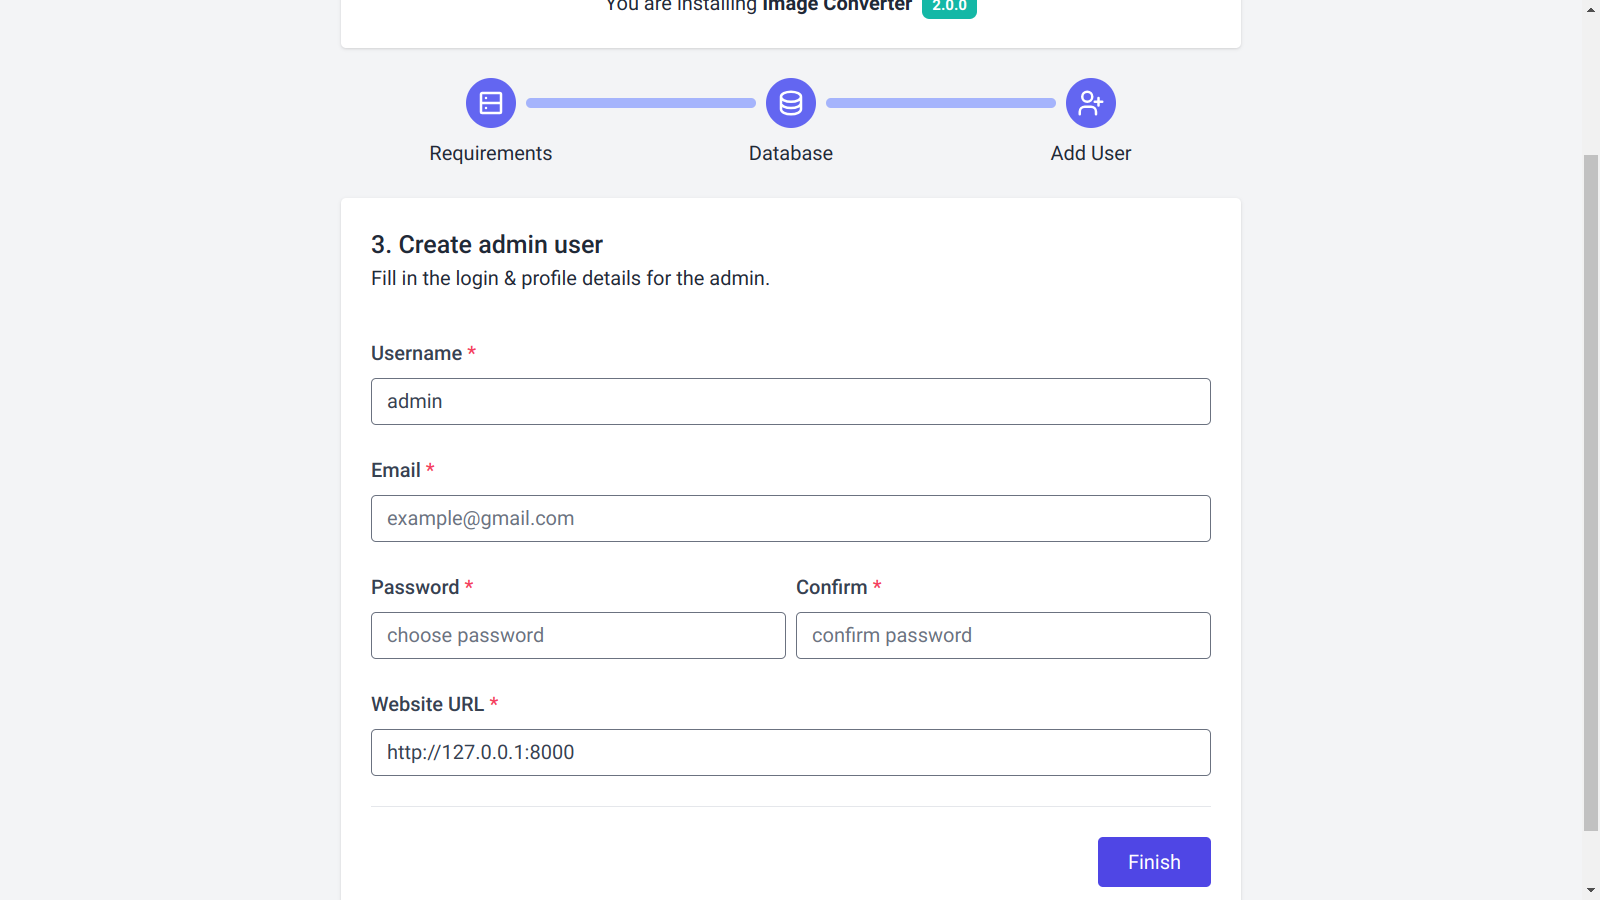
If successful, you’ll be redirected to the login page. Use the admin credentials you just created to log in and start using the application.

Image formats:
This script uses the PHP's Imagick extension to convert images into different formats. By default, Imagick supports many image formats, but, depending on your server, some formats may require third-party delegate libraries or extra configuration.
Shared hosting:
On shared hosting, supported formats depend on the provider. Since you cannot install additional libraries, you are limited to the default formats enabled by your host.
VPS hosting:
On a VPS, you have full control and can install the required libraries. The most common operating systems are Ubuntu and CentOS 7.
- Recommended: Ubuntu 22.04 or higher
- Not recommended: CentOS 7 (outdated and harder to maintain)
VPS: Ubuntu
By default, Ubuntu supports conversion from andto: APNG, AVIF, BMP, DDS, DIB, GIF, HDR, HEIC, HEIF, ICO, JP2, JPE, JPEG, PNG, PSD, RAW, TGA, TIFF, WBMP, and WEBP.
- PDF, AI, and EPS Support:
- Install Ghostscript:
- Edit ImageMagick policy:
- Enable SVG support:
- Enable APNG support:
- Enable HEIC/HEIF support:
PDF, AI, and EPS are supported as output formats only (not input). To enable them as input formats:
$ sudo apt install ghostscript
$ sudo nano /etc/ImageMagick-6/policy.xml
Or, depending on the system
$ sudo nano /etc/ImageMagick-7/policy.xml
And the bottom of the file before the inclusing
</policymap>
tag, paste in this code:
<policy domain="coder" rights="read|write" pattern="PS" />
<policy domain="coder" rights="read|write" pattern="PS2" />
<policy domain="coder" rights="read|write" pattern="PS3" />
<policy domain="coder" rights="read|write" pattern="EPS" />
<policy domain="coder" rights="read|write" pattern="PDF" />
<policy domain="coder" rights="read|write" pattern="XPS" />
$ sudo apt -y install libmagickcore-6.q16-6-extra
$ sudo apt install ffmpeg
$ sudo add-apt-repository ppa:strukturag/libheif
$ sudo apt update
$ sudo apt install libheif1
VPS: CentOS 7
CentOS 7 is commonly used in VPS hosting but is outdated. Many formats are not supported by default. Adding support often requires Remi's RPM repository, which can be complex. For this reason, CentOS 7 is not recommended for running this script.
Disable unsupported formats
Since not all formats may be supported on every hosting environment, the dashboard includes an option to enable or disable formats as needed. This ensures smoother operation without server-level configuration changes.

Dashboard Walkthrough:
The application includes a feature-rich dashboard that allows you to configure and manage many aspects of the script.
Main Page
After login, you will be redireted to the dashboard main page
https://example.com/admin/dashboard
This page displays general application information and static data.

Localization:
The app has a multilingual support. Supported languages include: English, Arabic, German, Spanish, French, Hindi, Italian, Japanese, Portuguese, Russian, Turkish, and Chinese.
By default, only the English version is provided. You must add translations for any additional languages you enable. Fortunately, the dashboard makes it easy to manage languages and translations.
Manage Languages
From the sidebar, under Localization > Manage Languages, you can:
- Set the default language
- Add or delete languages

Static Texts
Static texts are hardcoded strings such as button labels, section headers, and other fixed UI elements.
To edit translations for static texts:
- Navigate to Localization > Translations Manager
- Click Synchronize (top-right corner) to load all static strings
- Click Edit to add translations for each enabled language or update the default English text
- Use the search box to quickly locate specific texts


Dynamic Texts
Dynamic texts are user-generated strings, such as:
- Navbar links
- Footer content
- Converter labels
- Page metadata
- Post content
In the settings that supports dynmic texts, you'll see a language selector that allows you to switch between languages and display translatable fields. For example, in the Home Page settings, you can add translations for the French language.


Manage Converters:
The script allows the admin to create custom converters as needed. This flexibility ensures the converters combinaition is unique.
Create/Edit Converters
Under Converters > Manage Converters, a list of all converters is displayed.

- Click New Converter to add a new one, or click Edit to modify an existing one.
- On the settings page, fill in the converter details.
- Configure its options and select the input/output formats from the available list.

Converters Groups
On the home page, converters are grouped into two sections: Common Converters and More Converters. You can choose which converter appears in which group from the Groups Settings page.

Static Pages:
The Static Pages settings have three entries in the sidebar: Home Page, Contact Page, and Other Pages.
Home Page
In this section, you can:
- Edit meta tags
- Upload a brand image
- Enable/disable the uploader
- Configure other home page available options

Contact Page
Here, you can:
- Enable/disable the contact page
- Edit meta tags
- Add social media links
- Configure other contact page available options

Custom Pages
The app also supports creating custom pages.
- All custom pages are listed under the Other Pages entry.
- Click Edit to modify page settings.

Blog & Posts:
The app includes a simple blog system that allows creating posts and provide unique content to improve SEO. The blog settings and customizations are handled by two entries: Blog Page and Blog Posts.
Blog Page
Here you can:
- Enable or disable the blog
- Set the number of posts per page

Blog Posts
The Blog Posts settings page lists all your posts. You can:
- Create new posts
- Edit posts
- Publish/unpublish posts
- Configure other post available options

Other Settings:
The dashboard includes many additional configuration options accessible via the sidebar. Most of these are straightforward and easy to use, so they are not covered in detail here.
Listing every single setting would make this documentation unnecessarily long and repetitive, since most options follow the same structure and logic as the ones already explained. To keep the documentation concise and user-friendly, only the most important features are highlighted.
Finally:
If you need more assistance deploying the app, please contact me via my email westiti@gmail.com. I'll be glad to help.
That's all and good luck!